
You might have heard about the terms ‘‘Key line Diagram ’’ or ‘’Dieline’’ in artworks.
But, what do these words mean, especially in terms of packaging?
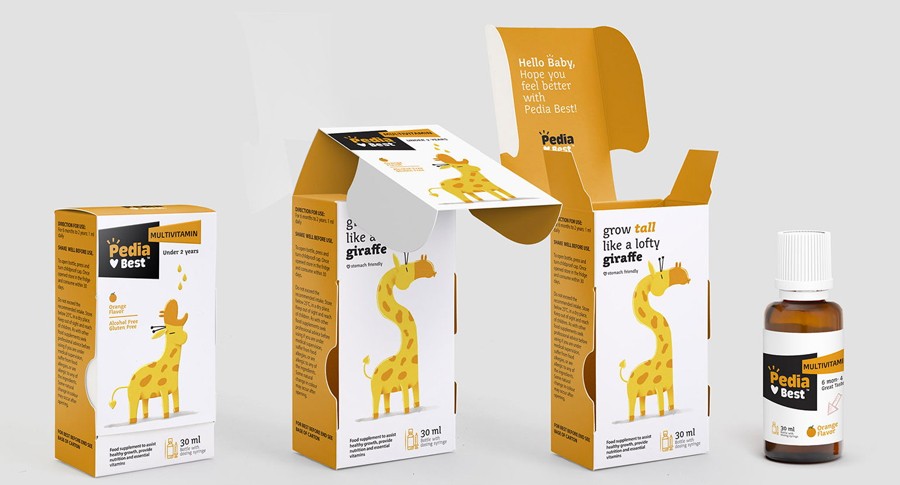
In the packaging world, these elements represent the same thing. In simple terms, it refers to the template or blueprint required to ensure the final layout of the physical package or box is correct.
For creating Keyline, a specific skill is required; these are designed with the help of packaging design agency, die cutters or printing companies. It is vital to ensure that all the dimensions are correct before executing the layout; therefore, professionals must implement it.
One of the significant advantages of Keyline is that once it created, designers can send the file to a plotting machine where they can deliver a quick physical sample to the customer. It is a great option that lets the designer and customer feel the actual packaging before production.
You can develop a keyline by just finding a box that resembles the one you are designing, unfold the tabs, flatten and measure it. These measurements will be the basis for the creation of your own Keyline’s.
What is a KLD or Dieline?
Key Line Dimension is the delegated area that holds marking for an artwork area. It majorly explains the cutting, folding areas and also known as dieline dimensions.
Every artwork requires specific cut off marks or keyline. Whether, be it a display stand, packaging or print material, there has to be a keyline for it. According to the keylines, the printer will print, cut, fold and fabricate the packaging.

Now let’s discuss the types of lines in KLD:
Types of Lines in the KLD
1.The Trim Line:
The trim line is the actual size of your final piece that forms the path along the corrugated or paperboard box that needs to be cut and folded. It is the basis of your physical package design, typically created with a white fill and a red or pink stroke.
By extending your design past the trim line, all the way to the bleed line, you need to ensure there are no unprinted edges, leaving nasty white lines around your design. When the trim line is cut out, the box will have its basic shape.
2.The Bleed Line:
The bleed line, placed outside the trim line, act as a safety net for any network that will extend to the edge of the trim line.
It creates a safe zone, or sometimes called a live zone, for the design. It shows where each visual element will be and leaves enough space to account for those placements.
The bleed area is printed but usually trimmed off according to the trim line. However, depending on your printer or the size of your package, you may need to increase your bleed width.
3.The Safe Zone Line:
Safe zone lines indicate the areas that are guaranteed to be visible on your custom printed cardboard box or other printed box. It is majorly important for the designers who will be using the dieline to guide their network.
The Safe Zone lines are usually marked using dotted lines and are offset inwards from the trim lines. A lot of concern is required in these lines as they mark the areas that will contain crucial printed content, such as branding, product name and other readable information.
4.The Fold Line:
Fold lines indicate where should the different planes of your package design fold and create a dimensional package.
The adaptation of text and graphics on the box can develop confusion. The best way to solve the problem is by making a prototype box from simple card stock or board, marking the surfaces and orientation, then unfolding the box.
Since the box contains multiple flaps and folds, you do not want the text to be upside down, mirrored or covered by a flap.
These lines are essential for building the packages and for the designers to ensure that elements are not placed along those fold lines.
How To Make A Packaging KLD or Dieline?
In labels and other dimensional packagings, you can create perfect keylines on your basic measurements with a piece of paper and a pencil. On the other hand, in terms of boxes, it is challenging to generate from scratch. Moreover, an experienced person can create it in a more accessible manner with less time.
One of the best ways to develop a box dieline from scratch is to transcript from a similar product and then adapt from there.
If you have advanced technology for structuring packaging applications, such as a printing facility production, you’ll have endless possibilities to generate perfect three-dimensional keylines.
However, when you are unsure about the concept, you can start rolling it, turn over your dielines, notes, and a product sample to a printer; they can implement it to create a working dieline.
The following are steps to create a packaging KLD or Dieline:
1.Deconstructing the Product or Package:
When you’ve had time to experience different packaging and you’ve found the one that resembles what you want for your product, you need to deconstruct it to see what makes it so unique. Then, unfold the tabs, flatten them down and measure, so you have the fundamentals for creating your dielines.
In a situation where your client gives you a sample package of some others, and they want theirs to be just like that, or they developed a product from scratch, they want a package or label for it; you’ll need to deconstruct it.
If you are forming a pre-existing package, it is essential to know how it works. You need to know the location of the tuck tabs, glue seems, then adaptation of the graphics and where the folds hit.
If you have the product but no package, you’ll need to make some basic measurements. For a bottle or jar, it is simple to make lines with the pencil. But for a free-standing product, you need to do the measurements of the product dimensions and make a box to get a feel of what size package you’ll need.
2.Making the Dieline:
The first step is to create a new file in illustrator. After this process, create a layer, mention it as “dieline” simultaneously create another layer and call it “artwork”. Place the dieline layer above the artwork layer. Also, ensure that your artboard is big enough to hold the dieline, including room for design notes and PMS swatches.
It is vital to follow the industry standard visuals while developing your keyline. Cutlines are solid red with .25 or .50 points in thickness. Once you end up with clean, accurate lines, lock the layer not to create any mess.
One of the significant advantages of keylines is you can adapt it according to your convenience within the options. If you want to give safe margins, use blue lines or put some guides. It’s acceptable to put notes on the keyline like “front panel”, “tuck flap”, etc.
If you are developing a pre-existing package, the best method to make a dieline is to break it into flat and then scan it at 300dpi. Then, you can start making your dielines with illustrators or other tools.
You can start by converting your paper measurements and prototypes into basic blocks to build packaging from scratch. It’s advisable to get a print of a hard copy sample before getting into too deep. Wrap the printed label around the container or cut out the box, fold it and tape it together.
You need to repeat this process until the dieline seems perfect. Only then, you can step into designing.
3.Producing a hard copy prototype:
Once you have a basic keyline, you can place your art on the artwork layer. Finally, create a hardcopy prototype of your package by printing out and assembling your design.
That will show you any errors in orientation, measurement, text or art placement and allow you to fix them. Once your dieline is ready, send it to the printer and ask for proof.
Suppose you receive this in digital rather than printed form, print and assemble it to check one last time for orientation, spelling, placement errors so on. If you can’t print out your keyline to full size, assembling a miniature version will work as, by this point, your measurements should be perfect.
Always make hard copy prototypes of packaging designs from your dielines. Just print them out on some decent quality inkjet paper, use a steel ruler, cut, fold, and tape them together.
4. Off to the Printer:
After you create the keylines, make a trial for some weeks. It is preferable to get a printout from PDF printer proof before approving the print run. It is better to print out the lines and assemble them or in a box if you want to print a miniature version that performs better.
However, a miniature that assembles perfectly is an acceptable substitute if the measurements are actual. You need to re-check each aspect before getting the print done. The overall goal at this stage is to avoid costly reprint due to mismanaged dieline or a simple typo.
Why You Can’t Use Adobe Photoshop To Create Dielines
The major problem of using other graphic design like Adobe Photoshop is that the final work is in vector art. Although it may look similar, vector art contains various mathematical calculations, numbers that computers and printers can easily recognize.
The advantage of a vector image is that we can resize them without any loss in quality. So, for example, you could print a pattern for a box in the size of a building, and it would look just as sharp as if we printed it on paper.
When you create your keylines, ensure that specifications are of paramount importance. For example, make sure that you know the exact size before completing the file in illustrator or InDesign. Also, print out a hard copy while creating your dieline; this may allow the production team to spot any errors before the design goes into production.
Conclusion
I hope this blog gives you a better understanding of keylines in packaging and how they set up. In this artwork, entire creativity is dependent upon the designer who develops it.
Keylines are everywhere around us, in most of our packaging and other forms. But the reality is that most of the times, we may not have noticed or think about it from that perspective. Therefore, even if your project is small or big, a reasonable effort is sufficient to develop such artworks.
As the technology develops, you have now many advanced technologies which make your work easier and flexible. Moreover, practice and experience is an essential factor to develop new creativity.
If you have any queries regarding Keylines in packaging, you can contact brand design agency. Our experts will provide you best creative options for your products.