
Sponsored by Eagle DTF Print
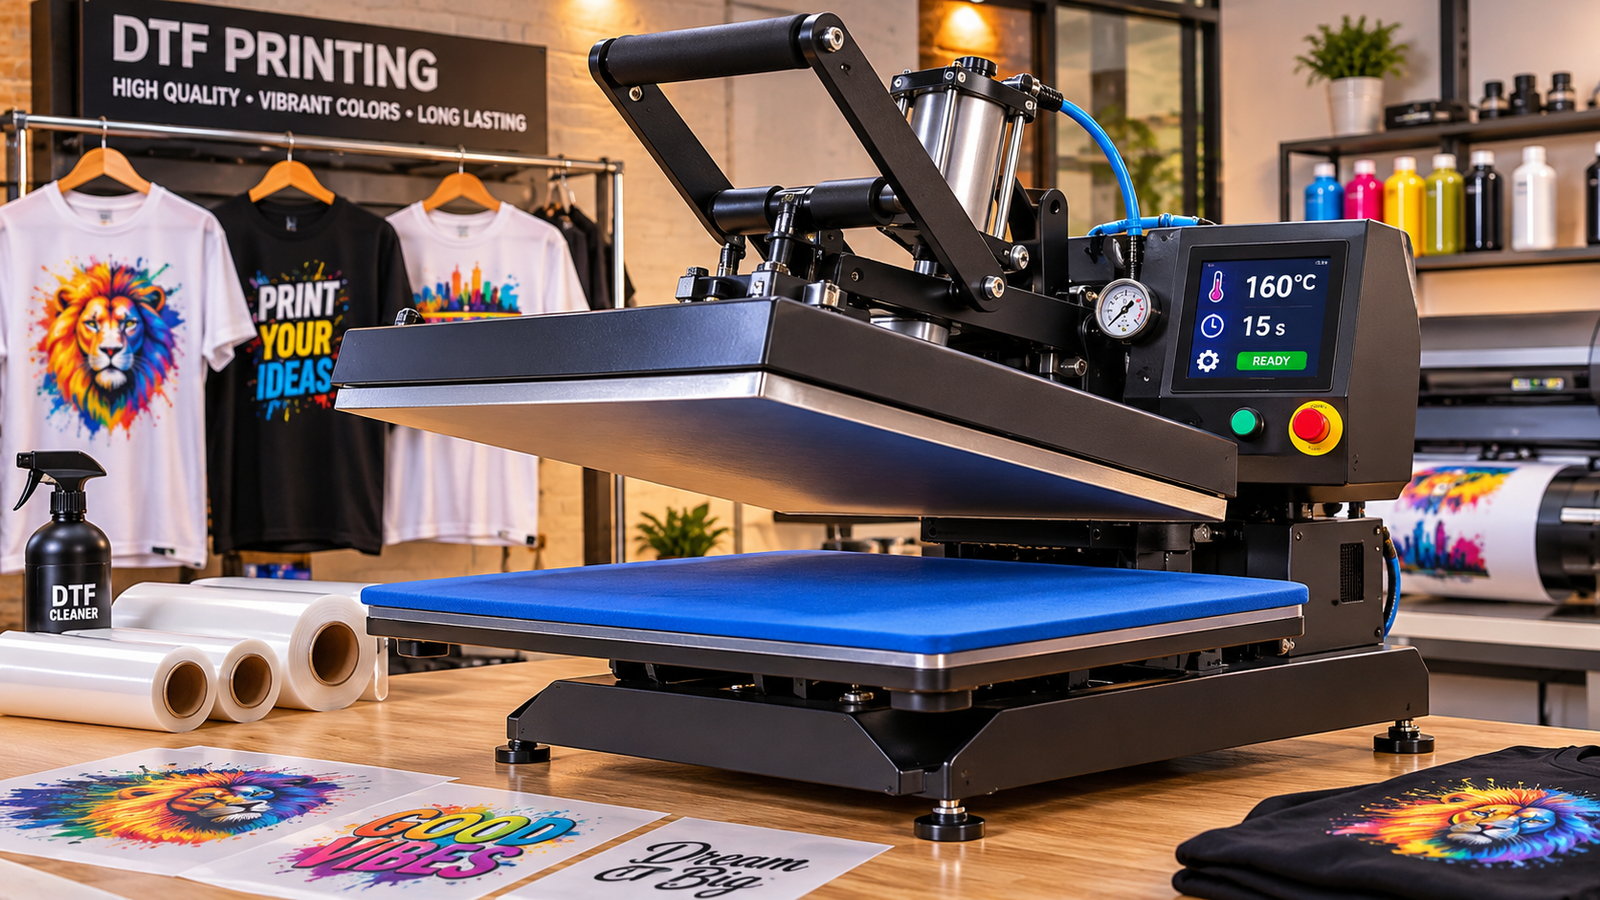
A consistent DTF heat press setup is essential for validating transfer repeatability and throughput before full productionWhen a shop adds a heat press, the useful question is whether the machine can repeat an approved result under normal production conditions.
An operator may make an excellent first print while working slowly and still have difficulty sustaining the same result across a short batch.
An acceptance test gives the shop a structured way to check the machine, the materials and the operator’s process before opening the job to regular production.
The test can use a spare set of garments, one transfer batch and a single work record.
The shop sets its acceptance criteria before the first sample.
That keeps the review focused on the job requirements.
Define the Work the Press Has to Handle
Before testing the equipment, establish the type of work the heat press is expected to perform.
The acceptance test should represent the actual garments, transfer materials, artwork and production conditions the machine will encounter.
A test performed using an easy-to-press cotton T-shirt may not adequately represent production involving heavyweight sweatshirts, polyester blends or garments with raised seams.
Choose a Representative Garment, Graphic and Placement
Select a garment that reflects the intended production requirements.
Record its construction, material composition, thickness, surface finish and manufacturer.
Choose artwork that includes features requiring different levels of application accuracy.
Fine text, isolated graphic elements, narrow lines and large solid printed areas can help reveal different transfer defects.
The placement should also reflect the intended production application.
For example, a large back graphic requires a reliable alignment reference and inspection of its outer edges.
A small left-chest design requires consistent positioning from one garment to another.
Record the following information before beginning:
- Garment model, material composition and batch identification.
- DTF transfer supplier and transfer batch or lot number.
- Artwork revision and design dimensions.
- Intended print placement and positioning tolerance.
- Any seams, pockets or raised garment features near the application area.
Using the same garment construction and transfer batch throughout the initial test reduces the number of variables that could influence the results.
Review Equipment Installation and Site Requirements
Before operating the press, review the manufacturer’s installation instructions and equipment specifications.
Confirm that the production area can accommodate the machine and provide sufficient access for loading, unloading, cleaning and maintenance.
Important considerations include electrical requirements, available workspace, platen dimensions, operating clearances, ventilation where required and access to replacement components.
Verify that the electrical supply, voltage, frequency, current capacity and grounding arrangements match the machine’s specifications.
Installation and electrical modifications should be handled by qualified personnel.
Hydraulic or pneumatic systems, where applicable, should also be checked according to the manufacturer’s installation and maintenance instructions.
Buyers comparing models can use the Pressly HYDRO1620 heat press specifications as one example of the documentation to review.
Obtain the instructions for the exact machine and transfer you will use.
Always obtain the documentation for the exact machine configuration being purchased.
Electrical requirements and equipment specifications should never be assumed to be identical across different models or regional versions.
Establish Measurable Acceptance Criteria
Before producing the first sample, agree on what constitutes an acceptable result.
Acceptance criteria should be based on the job requirements, garment specifications, transfer supplier’s application instructions and equipment manufacturer’s operating limits.
Useful criteria include:
- Platen temperature remains within the required operating range.
- Heat distribution is sufficiently consistent across the intended working area.
- Pressure and contact are appropriate for the garment construction.
- The actual pressing time matches the specified application procedure.
- Transfer placement remains within the agreed positioning tolerance.
- The design shows complete adhesion without unacceptable edge lifting.
- No visible scorching, discoloration or unacceptable garment damage occurs.
- The approved appearance can be repeated across the test batch.
- Required durability checks meet the agreed quality expectations.
Define how rejected samples will be identified and recorded.
Photographs showing defects beside an approved reference sample provide more useful evidence than subjective notes such as “looks fine.”
There is no single universal acceptance tolerance for every DTF application.
The criteria should reflect the specific production requirements rather than settings or expectations taken from an unrelated transfer or machine.
Verify Heat Press Performance Before Testing
A successful transfer depends on more than the temperature displayed on the machine’s control panel.
Before evaluating finished garments, verify that the heat press can deliver consistent operating conditions across the usable platen area and throughout repeated production cycles.
This stage is particularly important because equipment-related problems can otherwise be mistaken for transfer material or operator errors.
Check Actual Platen Temperature and Heat Distribution
The temperature displayed by the heat press controller does not necessarily represent the exact temperature across the entire platen surface.
Differences can occur between the centre, edges and corners of the heated platen.
A machine may display the correct set temperature while certain working areas remain hotter or cooler than others.
Start by allowing the machine to reach its operating condition according to the manufacturer’s instructions.
Measure the platen surface at several predefined positions, including the centre, corners and other areas relevant to the expected print dimensions.
Suitable measurement methods may include calibrated contact temperature probes, thermocouples or heat press temperature test strips designed for this purpose.
Non-contact infrared thermometers can be useful for certain checks, but their readings may be affected by surface properties, emissivity and measurement conditions.
They should not automatically be treated as a substitute for a properly validated surface-temperature measurement method.
Record both the controller set-point and the measured temperatures.
A useful temperature verification record includes:
| Measurement location | Controller setpoint | Measured temperature |
|---|---|---|
| Centre | Record value | Record value |
| Upper left | Record value | Record value |
| Upper right | Record value | Record value |
| Lower left | Record value | Record value |
| Lower right | Record value | Record value |
Compare the measurements with the manufacturer’s specifications and the temperature requirements of the selected DTF transfer.
Repeat measurements when necessary to establish whether the observed differences are consistent or temporary.
The objective is not simply to reach a target temperature at one point.
The entire usable application area must provide suitable and repeatable thermal conditions.
Check Pressure and Contact Uniformity
Pressure distribution is another critical factor in DTF transfer application.
Uneven contact between the heated platen and the garment can contribute to incomplete adhesion, edge lifting and inconsistent transfer results.
Begin by inspecting the platen alignment, supporting pad and condition of the working surfaces.
Damaged, worn or uneven pads can affect the way pressure reaches the garment.
A preliminary pressure-contact check can be performed using identical paper strips positioned at different points of the platen, provided this method is permitted by the equipment manufacturer’s instructions.
Differences in resistance when withdrawing the strips can indicate possible contact inconsistencies.
However, this is a qualitative screening method, not a calibrated measurement of pressure in PSI or MPa.
For a more detailed assessment, suitable pressure-indicating film or another manufacturer-approved pressure mapping method can be used.
The measurement material must be appropriate for the intended application conditions.
The test should also consider the actual garment construction.
A platen may contact a thin cotton T-shirt differently from a heavyweight sweatshirt with raised seams or other structural features.
The objective is to verify that the working area provides sufficiently consistent contact under the conditions expected during production.
Verify Timer Accuracy and Dwell Time
The heat press timer controls the application period during which the transfer receives the specified heat and pressure.
An inaccurate timer can introduce inconsistencies between production cycles, even when the temperature and pressure are correctly adjusted.
Compare the machine’s timer with an independent stopwatch over several cycles.
Follow the manufacturer’s instructions regarding when the timer starts and how the pressing cycle is triggered.
Record the programmed time and the observed pressing time.
It is important to distinguish between two measurements:
Press dwell time is the period during which the closed press applies heat and pressure to the transfer.
Total handling time includes garment loading, positioning, alignment, pressing, peeling, any additional finishing press and unloading.
Both measurements are necessary when assessing the equipment’s suitability for a production target.
Check Temperature Recovery During Repeated Cycles
A heat press may perform well during a single isolated application but behave differently when operated continuously.
Repeated opening and closing can influence temperature stability, depending on the machine’s heating capacity, platen construction and operating conditions.
Run several consecutive cycles using the expected production sequence.
Monitor platen temperature at consistent measurement positions and record any changes observed during the test.
Pay particular attention to the period between consecutive applications and whether the machine maintains the temperature required by the transfer supplier.
If temperature changes appear during repeated operation, investigate the machine’s heating system, operating cycle and production requirements before proceeding.
This test helps establish whether the press can maintain suitable thermal conditions during normal production rather than only during occasional applications.
Check Machine Safety and Operating Conditions
An acceptance test should also confirm that the machine can be operated safely in its intended workspace.
Inspect the power cable, electrical connections, supporting structure, operating controls and accessible moving components.
Verify that emergency release mechanisms and relevant protective features operate according to the manufacturer’s instructions.
Operators should understand the risks associated with hot surfaces, closing mechanisms and any hydraulic or pneumatic components.
The machine should be positioned on a stable surface with sufficient clearance for normal operation and maintenance.
Safety checks should be completed before the production test begins, and any identified equipment defect should be resolved before acceptance.
Prepare an Approved Reference Garment
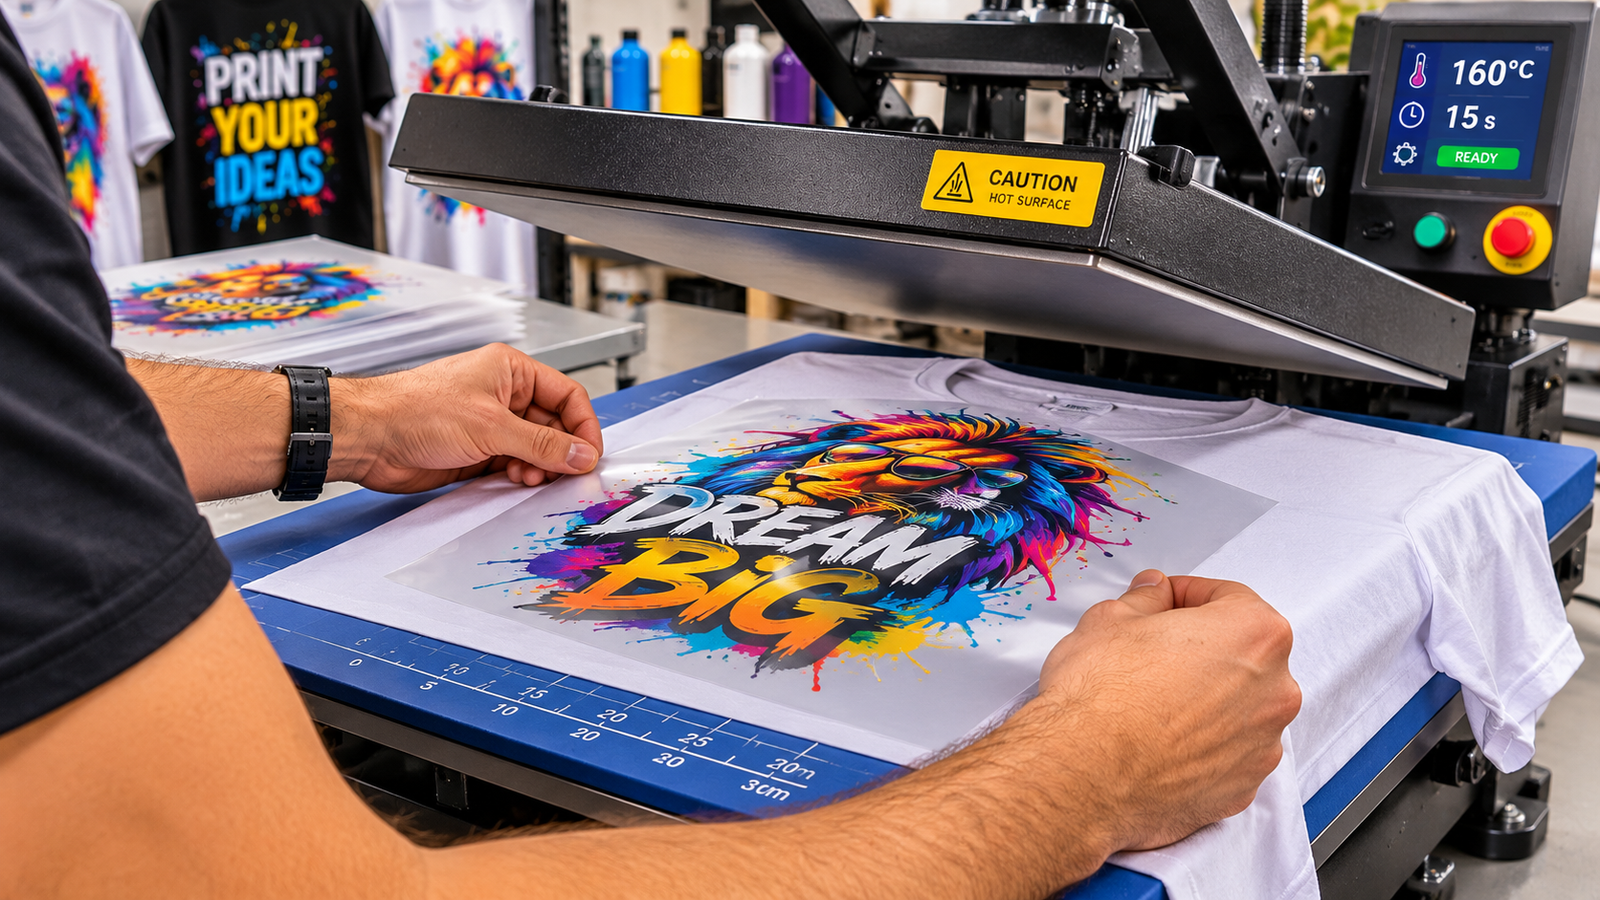
Careful alignment of the transfer film and consistent garment placement ensure reliable repeatability across the batchOnce the basic machine checks have been completed, prepare a reference garment that will serve as the quality benchmark for the rest of the test.
The reference sample establishes the appearance and application conditions that subsequent garments must reproduce.
Apply the Transfer Using Supplier-Approved Settings
Use the application instructions supplied with the specific DTF transfer.
Do not automatically apply temperature, pressure and pressing times taken from another transfer manufacturer or a different garment construction.
DTF application parameters can vary depending on the adhesive system, film construction, fabric composition and intended finishing procedure.
The application process may include:
- Preparing and flattening the garment.
- Pre-pressing the material when required by the supplier.
- Positioning the transfer accurately.
- Applying the specified heat and pressure for the recommended dwell time.
- Removing the carrier film according to its hot, warm or cold peel instructions.
- Performing an additional finishing press when specified.
Pre-pressing may help remove moisture and wrinkles from certain garments, but it should be performed according to the applicable garment and transfer instructions.
The same applies to post-pressing. Some transfers require an additional finishing step using a protective sheet, while others may specify a different procedure.
Following the supplier’s instructions is essential because an incorrect peeling or finishing procedure can affect the final result even when the initial pressing conditions are correct.
Inspect Placement, Adhesion and Print Appearance
After the application and any required finishing procedure, inspect the reference garment.
Allow the sample to cool or settle according to the transfer supplier’s instructions before making the final assessment.
Examine the complete design, including its outer edges, small text, narrow lines and isolated graphic details.
Check for:
- Incomplete adhesion or visible lifting.
- Poorly transferred small details.
- Distorted or stretched graphic elements.
- Unacceptable surface marks or wrinkles.
- Scorching or discoloration of the garment.
- Incorrect positioning or alignment.
- Visible inconsistencies between the design and the approved artwork.
Where placement accuracy matters, photograph the sample with a ruler or another clearly identifiable measurement reference.
Use consistent lighting when comparing samples so that changes in surface appearance can be evaluated more reliably.
If the reference sample passes the established criteria, retain it at the workstation throughout the remaining test.
It becomes the visual benchmark for evaluating subsequent applications.
Record and Retain the Approved Reference Sample
Document the complete application conditions associated with the accepted garment.
Record the transfer batch, garment model, artwork revision, measured temperature, programmed time, pressure setting, peel procedure and any additional finishing steps.
Keep the approved physical sample and its photographs with the test documentation.
This prevents later inspections from relying entirely on an operator’s memory or subjective assessment.
Run a Short Batch Under Normal Production Conditions
After approving the reference garment, conduct a short production run.
The objective is to determine whether the heat press can reproduce the approved result when operated at a realistic working pace.
An isolated successful application is not sufficient evidence of production consistency.
Select a Representative Batch Size
Choose a batch size that reflects the type of work the shop expects to produce.
For an initial short-run acceptance test, twenty garments can provide a practical starting point.
This is an illustrative sample size, not a universal industrial standard.
Larger production volumes or more demanding applications may require additional testing.
Number each garment in the order it passes through the machine.
Use the same transfer batch, garment model and artwork revision throughout the initial test.
This allows equipment and process variations to be evaluated without introducing unnecessary material changes.
Measure Press Cycle Time and Total Handling Time
Measure the complete production sequence from the first garment being positioned to the last approved piece being ready for its next production stage.
Record loading time, transfer positioning, pressing time, peeling, additional finishing and unloading separately where practical.
A machine with a short pressing cycle does not necessarily deliver the highest finished output.
Manual handling, difficult positioning, cooling requirements and additional finishing can significantly influence the total production time.
Calculate the realistic output using the complete application workflow rather than relying exclusively on the timer displayed by the press.
Inspect the First, Middle and Final Pieces
Do not inspect only the first garment.
Examine the first, several intermediate garments and the final pieces in the batch.
Look for changes in adhesion, placement, design appearance and garment condition.
A defect that appears only in the middle of a production run may suggest a different problem from one that consistently affects a particular area of the platen.
Document all rejected or reworked samples, including their production sequence numbers.
Reviewing the results across the entire batch helps identify whether the process is stable or whether performance changes during repeated operation.
Evaluate Results and Separate Equipment Capability from Production Performance
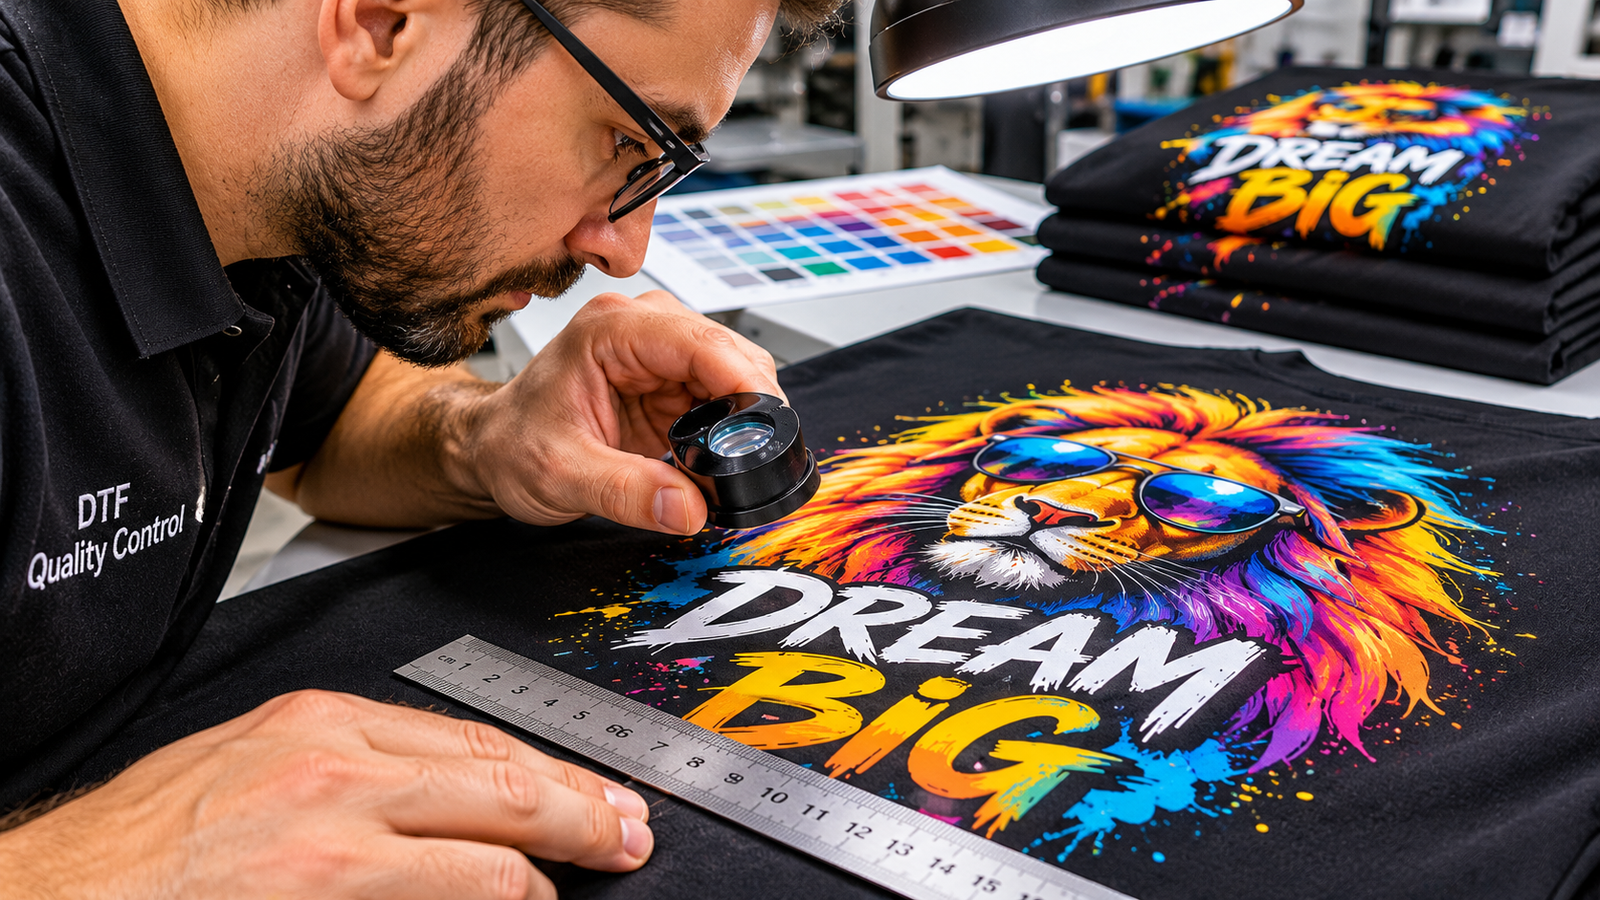
Inspect the full visible design, small details, and placement precision against your acceptance criteriaOnce the batch has been completed, evaluate the recorded measurements and inspection results.
The assessment should distinguish between machine capability, process repeatability and production performance.
Calculate the First-Pass Acceptance Rate
Record the number of garments attempted, the number accepted without rework, the number reworked and the number rejected.
The first-pass acceptance rate is calculated as follows:
First-Pass Acceptance Rate = (First-Pass Accepted Pieces / Total Pieces Attempted) × 100
For example, if twenty garments are processed and nineteen pass the initial inspection without correction:
(19 / 20) × 100 = 95%
The first-pass acceptance rate for this test is 95%.
This describes the specific test run, using the selected artwork, garments, transfer batch and operating conditions.
It should not be interpreted as a guaranteed production yield for all future jobs.
Reworked garments should be recorded separately because they did not pass the initial inspection.
Understand the Difference Between Machine Capability and the Production Target
A heat press can successfully apply a particular transfer without necessarily meeting the shop’s required production output.
These are different measurements.
Machine capability describes whether the equipment can provide the necessary temperature, pressure, contact and timing conditions.
Process repeatability describes whether the same application procedure can reproduce an acceptable result across multiple cycles.
Production performance describes how efficiently the complete application workflow produces finished garments.
First-pass yield measures the proportion of garments accepted without rework during the initial inspection.
A shop should evaluate all four factors before deciding whether the machine and its operating procedure meet the intended production requirements.
If the equipment will process several garment types or transfer constructions, each important material combination should receive its own validation.
Evaluate Transfer Adhesion and Durability
A transfer that looks excellent immediately after pressing has not necessarily demonstrated sufficient long-term performance.
Visual inspection should therefore be complemented by appropriate adhesion and durability checks.
Inspect the transferred design for lifting, incomplete bonding, cracking or other unacceptable defects.
Where wash durability is part of the product specification, perform a controlled wash test following the transfer supplier’s and garment manufacturer’s care instructions.
Document the relevant conditions, including:
- Garment and transfer identification.
- Time between application and testing, where specified.
- Washing temperature and programme.
- Detergent and care instructions.
- Drying method.
- Number of completed washing cycles.
- Observed changes in adhesion and appearance.
Do not assume that a particular number of washing cycles is a universal DTF acceptance standard.
The required testing method and acceptance criteria should be agreed before testing begins.
Durability validation is particularly important when garments are intended for customers who expect repeated washing and regular use.
Decide What to Retest After a Failure
When a test does not meet the established criteria, the next step should be to identify the possible source of the defect rather than immediately changing multiple machine settings.
The appearance and location of the problem can provide useful diagnostic information.
Identify the Possible Cause of the Defect
The following table provides a practical starting point for investigating common DTF application problems.
| Observed problem | Initial areas to investigate |
|---|---|
| One corner of the transfer lifts | Local platen temperature, contact and pressure uniformity |
| The entire transfer shows poor adhesion | Actual temperature, dwell time, pressure and peel procedure |
| Some details fail to transfer | Small-element adhesion, surface contact and peeling procedure |
| Garment shows heat marks or discoloration | Temperature, dwell time and fabric compatibility |
| Results vary between consecutive garments | Temperature recovery, garment positioning and repeated-cycle consistency |
| Transfer looks acceptable but fails after washing | Adhesion quality, transfer compatibility and application procedure |
| Graphic placement varies across the batch | Alignment references, garment positioning and operator technique |
These are diagnostic starting points rather than definitive explanations. A single defect can have several possible causes.
Change One Variable at a Time
Once a possible cause has been identified, conduct a controlled retest.
Change one relevant process variable at a time, within the equipment manufacturer’s and transfer supplier’s recommendations.
For example, if adhesion is inconsistent, first verify actual platen temperature and pressure contact before making changes to the dwell time.
Record the original conditions, the adjustment and the result.
Changing temperature, pressure and pressing time simultaneously makes it difficult to identify which adjustment improved or worsened the application.
Maintain the original reference sample and compare all new results against the agreed acceptance criteria.
Validate the Process with a Second Operator
A successful production test performed by one experienced operator does not automatically demonstrate that the procedure can be reproduced by another team member.
Schedule a second operator to repeat the approved application using the documented settings and work instructions.
Observe whether garment positioning, transfer alignment, peeling and finishing can be completed consistently.
If the second operator encounters difficulties, review the written procedure and identify steps that require clearer instructions or additional training.
This helps distinguish problems caused by equipment performance from those related to operator technique.
Document and Approve the Production Process
An acceptance test should conclude with a complete record of the equipment, materials, operating conditions and inspection results.
Documentation is important for training, repeat orders, troubleshooting and future production comparisons.
Maintain a Complete Acceptance Test Record
The following table can be used as a basic acceptance test record.
| Record category | Information to document |
|---|---|
| Equipment | Manufacturer, model and serial number |
| Transfer | Supplier, transfer type and batch number |
| Garment | Model, material composition and batch |
| Temperature | Controller setpoint and verified platen temperatures |
| Pressure | Machine setting and contact uniformity check |
| Timing | Programmed dwell time and observed cycle time |
| Application | Pre-press, peel and post-press procedure |
| Batch results | Number attempted, accepted, reworked and rejected |
| Production time | Total batch duration and average handling time |
| Quality inspection | Visual inspection and adhesion results |
| Durability | Wash test method and recorded observations, where applicable |
| Authorization | Operator and production manager approval |
This record provides a reference for future production runs and makes it easier to identify changes in machine performance, materials or application procedures.
Approve the Tested Machine and Material Combination
The production lead should review the complete test results before authorizing regular production.
Approval should identify exactly what has been tested.
For example, a machine validated using one cotton T-shirt construction and one DTF transfer batch should not automatically be treated as approved for every polyester garment, heavyweight sweatshirt or specialty transfer.
Different material combinations may require additional validation.
The approval record should include the equipment configuration, tested materials, application settings, production results and any outstanding conditions that require further inspection.
If any important acceptance criterion remains unmet, the machine or process should not be released for the affected production application until the issue has been investigated and corrected.
A properly completed acceptance test provides more than evidence that a heat press can produce one successful transfer.
It establishes a documented operating procedure that can be repeated, evaluated and maintained by the production team.
Frequently Asked Questions About DTF Heat Press Testing
How Do You Check Temperature Uniformity on a Heat Press?
Allow the machine to reach its normal operating condition and measure the platen surface at several predefined positions, including the centre and corners.
Use a suitable calibrated contact probe, thermocouple or heat press temperature test strips designed for the measurement.
Compare the measured values with the controller set-point and the equipment manufacturer’s specifications.
Temperature mapping helps identify areas that may not provide consistent thermal conditions during DTF application.
How Do You Test Pressure Consistency Across a Heat Press Platen?
Inspect the platen alignment, supporting pad and contact surface first.
A preliminary paper-strip test may help identify obvious differences in contact when performed according to the equipment manufacturer’s instructions.
For more detailed evaluation, use an appropriate pressure-indicating method designed for the application conditions.
Remember that a basic contact test does not provide a calibrated pressure measurement in PSI or MPa.
How Many Samples Should Be Included in a DTF Heat Press Acceptance Test?
A short initial batch of twenty garments can provide a useful starting point for evaluating repeatability and identifying common application problems.
However, twenty samples are not a universal industry requirement.
The appropriate test size depends on the production volume, garment construction, transfer type, quality requirements and risk associated with the application.
More demanding production environments may require larger batches and additional validation runs.
Is a Visual Inspection Enough to Confirm DTF Transfer Quality?
No. Visual inspection is an important first step, but it cannot establish every aspect of transfer performance.
An acceptance procedure should also evaluate placement, adhesion, edge integrity, application consistency and garment compatibility.
Where durability is required, follow an appropriate wash-testing procedure based on the transfer supplier’s and garment manufacturer’s instructions.
Should Every New Garment Type Be Tested Before Production?
Yes, a new garment construction should receive appropriate validation before being treated as an approved production combination.
Different fabric compositions, surface finishes, thicknesses and garment features can influence heat transfer application.
A press setting that works successfully on one garment should not automatically be assumed suitable for another.
Conclusion: Establish a Repeatable DTF Heat Press Production Process
A successful first transfer is only the beginning of a proper equipment acceptance process.
A reliable DTF heat press must demonstrate suitable temperature distribution, consistent pressure contact, accurate application timing and stable performance under repeated production conditions.
Equally important, the selected transfer materials and garment constructions must produce acceptable results when processed using the documented application procedure.
By combining equipment verification, reference sample approval, short-batch testing, durability evaluation and production documentation, print shops can make better-informed decisions before releasing a heat press for regular operation.
The final objective is not simply to produce one attractive garment. It is to establish a repeatable production process that delivers consistent quality, reduces avoidable rework and gives operators a documented reference for future jobs.
A properly documented acceptance test also provides a useful baseline for equipment maintenance, operator training and future machine comparisons.
The best time to identify a production problem is before the first customer order enters the machine.